
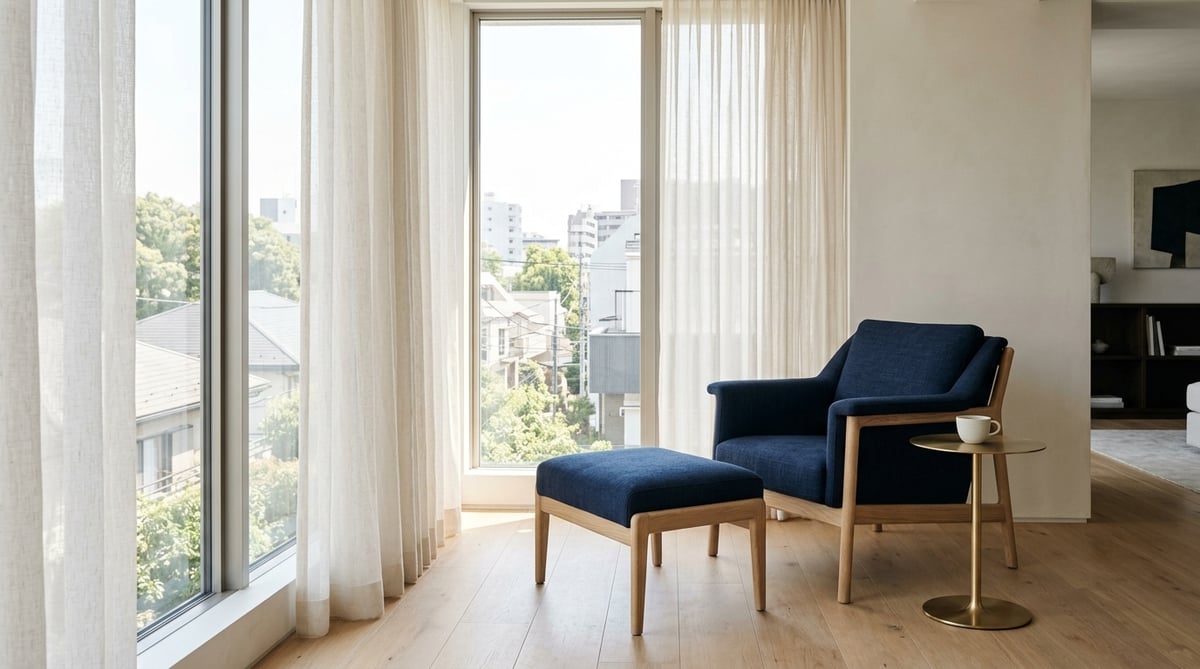
Emerging from Exit 1 of Hon-Komagome Station on the Tokyo Metro Namboku Line, near the Mukogaoka 2-chome intersection where Hongo-dori and Hakusan-dori cross at an angle, you are greeted by wide sidewalks flanked by mid-rise residential buildings and modest street-level shops in a tranquil, measured density. Walking along this orderly boulevard, free from noisy entertainment facilities or imposing commercial towers, prospective international residents frequently share their initial impressions: "The calm, dignified atmosphere characteristic of Bunkyo Ward is very appealing, but will daily grocery shopping feel slightly limited?" or "Would it be more convenient to rent an apartment down the slope closer to Hakusan Station?"
Situated comfortably inside the Yamanote Line loop within prestigious Bunkyo Ward, Hon-Komagome Station (Station Number: N13) features average rental rates of approximately 109,000 yen for a 1K, 182,000 yen for a 1LDK, and 258,000 yen for a 2LDK (averaging around 4,300 yen per square meter). With 1LDK and 2LDK layouts around central business districts directly on the Namboku Line—such as Iidabashi, Nagatacho, and Tameike-sanno—reaching 240,000 to over 400,000 yen, Hon-Komagome stands out as a balanced option for professionals, couples, and expatriate families seeking central proximity paired with a serene living environment within a sustainable budget. However, navigating daily life smoothly depends heavily on how you approach its low-key commercial landscape and its close, 3- to 4-minute walking connection to Hakusan Station on the Toei Mita Line.
Evaluating Hon-Komagome solely by its immediate station entrance metrics often leads to misjudging its true convenience. The genuine value of this residential district emerges when you view the supermarkets and transit schedules of neighboring Hakusan as an integrated part of your immediate walking perimeter. Below, a licensed real estate professional outlines the essential criteria to evaluate before signing a lease: the structural rent differences compared to surrounding areas, the distinct commuting and shopping patterns across its three official station exits, the firm ground conditions of the Hongo Plateau alongside its slope considerations, and clear trade-offs for when choosing an adjacent station might serve your lifestyle better.
- Average rents stand at 109,000 yen for a 1K, 182,000 yen for a 1LDK, and 258,000 yen for a 2LDK (approx. 4,300 yen/sqm). Rental prices remain moderate compared to central Bunkyo Ward hubs, offering direct transit to Iidabashi, Yotsuya, Nagatacho, and Tameike-sanno without transfers.
- Exit 1 sits just a 3- to 4-minute walk from Hakusan Station on the Toei Mita Line. Rents around Hon-Komagome are approximately 9,000 yen lower for 1K units and 16,000 to 25,000 yen lower monthly for 1LDK and 2LDK units than around Hakusan Station, allowing residents to save on housing costs while enjoying direct commutes to Otemachi and Hibiya alongside Hakusan's grocery options.
- The station area lacks major commercial malls, and barrier-free access from street level to the platform is restricted to a single dedicated elevator entrance. Situated on the solid Diluvium soil of the Hongo Plateau, flood risk is minimal, though walking down toward Hakusan-shita or Sendagi involves noticeable inclines that require on-site route verification.
Hon-Komagome Rent Trends and Dual-Subway Transit Convenience
Moderate Rental Rates in Bunkyo Ward Compared to Central Business Districts
The Tokyo Metro Namboku Line cuts directly through major government and commercial quarters in Minato and Chiyoda wards before continuing northward through Bunkyo and Kita wards. As a result, monthly housing expenditures fluctuate substantially depending on which station along the line you select. When reviewing the overall route, traveling north from downtown districts like Tameike-sanno, Nagatacho, and Iidabashi through Korakuen and Todaimae to Hon-Komagome reveals a distinct moderating trend in rent per square meter, even within the borders of Bunkyo Ward.
| Station Name (Ward) | Est. Price / m² | Studio (1R) | 1K | 1DK | 1LDK | 2LDK |
|---|---|---|---|---|---|---|
| Hon-Komagome (Bunkyo) | ¥4,300 | ¥81,000 | ¥109,000 | ¥134,000 | ¥182,000 | ¥258,000 |
| Hakusan (Bunkyo) | ¥4,550 | ¥87,000 | ¥118,000 | ¥145,000 | ¥198,000 | ¥283,000 |
| Todaimae (Bunkyo) | ¥4,500 | ¥85,000 | ¥114,000 | ¥141,000 | ¥194,000 | ¥275,000 |
| Korakuen (Bunkyo) | ¥4,600 | ¥88,000 | ¥119,000 | ¥147,000 | ¥200,000 | ¥286,000 |
| Komagome (Toshima) | ¥4,100 | ¥77,000 | ¥104,000 | ¥128,000 | ¥173,000 | ¥243,000 |
| Iidabashi (Chiyoda) | ¥5,200 | ¥104,000 | ¥140,000 | ¥172,000 | ¥242,000 | ¥354,000 |
| Tameike-sanno (Chiyoda) | ¥5,800 | ¥120,000 | ¥162,000 | ¥200,000 | ¥284,000 | ¥418,000 |
Two primary factors account for Hon-Komagome's stable, temperate pricing compared to neighboring Bunkyo hubs. First, because it operates solely on the Namboku Line without direct in-station connections to lines like the Marunouchi or Toei Oedo lines (such as at Korakuen), it does not carry the transfer-hub premium seen elsewhere. Second, rather than hosting high-traffic retail complexes or dense entertainment zones outside the university gates, the neighborhood has preserved a high-quality residential stock composed predominantly of low-to-mid-rise condominium complexes and family-oriented rental properties.
This price differential becomes especially meaningful for couples and expanding families seeking larger floor plans. While a monthly budget of 250,000 yen often limits choices in Chiyoda or Minato wards to compact 1LDK apartments, accepting an effortless 12- to 17-minute commute to Hon-Komagome brings well-appointed modern 1LDKs or generous 50-square-meter 2LDK homes firmly within reach. Securing sufficient space for a home office, quiet reading, or family cooking without compromising monthly savings is frequently cited as the most rewarding factor by international tenants we assist.
De Facto Two-Line Access: Walking 3–4 Minutes to Hakusan Station on the Toei Mita Line
While standard real estate search engines list Hon-Komagome primarily as a single-station stop, walking through the neighborhood immediately illustrates its practical advantage: an exceptionally close walking connection to Hakusan Station (Station Number: I13) on the Toei Mita Line. Walking gently downhill toward Hakusan-dori from Exit 1 brings you to Hakusan Station's entrances in approximately 3 to 4 minutes. While you will need an umbrella on rainy days because there is no subterranean pedestrian tunnel, crossing a single traffic light grants you seamless access to two independent subway networks.
| Station / Line Used | Key Destination | Stops Away | Estimated Travel Time | Commuting & Transit Characteristics |
|---|---|---|---|---|
| Hon-Komagome (Namboku Line) | Korakuen | 2 stops | approx. 4 mins | Transfer point for Marunouchi and Oedo (Kasuga) lines; convenient for Tokyo Dome City retail |
| Hon-Komagome (Namboku Line) | Iidabashi | 3 stops | approx. 6 mins | Major interchange connecting to JR Chuo-Sobu Line, Tozai Line, Yurakucho Line, and Oedo Line |
| Hon-Komagome (Namboku Line) | Yotsuya | 5 stops | approx. 10 mins | Seamless connection to JR Chuo Rapid and Marunouchi Line, offering swift access to Shinjuku |
| Hon-Komagome (Namboku Line) | Nagatacho & Tameike-sanno | 6–7 stops | approx. 12–15 mins | Direct access to Kasumigaseki and Akasaka; connects with Ginza, Hanzomon, and Chiyoda lines |
| Hon-Komagome (Namboku Line) | Roppongi-itchome & Azabu-juban | 8–9 stops | approx. 16–19 mins | Direct ride to prominent corporate hubs and international dining venues across Minato Ward |
| Hakusan (Toei Mita Line) | Jimbocho | 3 stops | approx. 6 mins | Transfers to Hanzomon Line and Toei Shinjuku Line; practical for Kudan and the bookstore district |
| Hakusan (Toei Mita Line) | Otemachi & Hibiya | 4–5 stops | approx. 8–11 mins | Direct connection to Marunouchi financial center; walking distance to JR Tokyo Station Shinkansen |
| Hakusan (Toei Mita Line) | Mita | 9 stops | approx. 18 mins | Direct access to Tamachi business offices; connects to Toei Asakusa Line for Haneda Airport |
While the Namboku Line excels at providing direct links to western business nodes like Nagatacho, Tameike-sanno, and Roppongi-itchome, reaching Otemachi, Hibiya, or Mita directly requires an intermediate transfer. Having Hakusan Station within an easy stroll solves this completely: working professionals can leverage both the Marunouchi/Otemachi axis (via the Mita Line from Hakusan) and the Akasaka/Roppongi axis (via the Namboku Line from Hon-Komagome) without transfers. For working international couples whose employment locations differ across town, this setup removes daily commuting friction, letting both partners walk comfortably to their respective subway lines.
Furthermore, both lines operate local services throughout the central Tokyo core, eliminating the stress of standing on crowded platforms while express trains pass. Hon-Komagome's third-basement platform (a single island platform with two tracks) is fitted with full-height platform screen doors that extend nearly to the ceiling. This provides safety during rush hour or when traveling with small children, while having two separate subway operators within walking distance grants built-in transit redundancy whenever train delays occur.
Simply enter the rent and deposit from portal listings to calculate a full, itemized breakdown including brokerage and guarantor fees without hidden add-ons.
Comparing Hakusan, Komagome, and Todaimae: How to Choose
Hon-Komagome vs. Hakusan: Leveraging Lower Rents While Using Hakusan’s Shops
The question most frequently raised by international clients exploring this district is: "If Hakusan Station is only a 3- to 4-minute walk away, wouldn't it be more practical to lease an apartment directly adjacent to Hakusan Station for easier shopping?" It is true that the perimeter around Hakusan Station (Hakusan 5-chome and Hakusan 1- and 2-chome) concentrates multiple grocery stores, pharmacies, and casual local eateries right outside the gates, creating greater immediate commercial vitality.
However, examining market pricing reveals that apartments around Hakusan Station (averaging 4,550 yen/m²) command monthly premiums of roughly 9,000 yen for a 1K, 16,000 yen for a 1LDK, and 25,000 yen for a 2LDK compared to Hon-Komagome (4,300 yen/m²). Over a standard two-year lease term, this represents a cumulative difference of approximately 380,000 yen on a 1LDK and nearly 600,000 yen on a 2LDK. Selecting an address in Hon-Komagome 1-chome or the southwestern residential blocks allows your apartment building to sit on a peaceful, quiet street, while keeping the Hakusan station gates and fresh food markets within an easy 4- to 6-minute stroll.
In real estate practice, anchoring your primary residence on the cost-efficient Hon-Komagome side while using Hakusan's retail and Mita Line access as an everyday backyard represents an exceptionally smart balance. Conversely, if you prioritize low-rise residential zones (such as Hakusan 4-chome, strictly designated as a Category I Exclusively Low-Rise Residential Zone limited to three floors) or wish to eliminate all uphill walking on your daily return journey, budgeting slightly higher to focus directly on Hakusan will be your best approach.
Hon-Komagome vs. Komagome: Yamanote Line Connectivity vs. Bunkyo Serenity
Located just one stop north on the Namboku Line, Komagome Station (Toshima Ward; averaging 4,100 yen/m²) provides direct interchange with the JR Yamanote Line, offering one-seat transit to major terminals including Ikebukuro, Shinjuku, Shibuya, Ueno, Tokyo, and Shinagawa. Rents there are slightly lower than Hon-Komagome—roughly 5,000 yen less for a 1K, 9,000 yen less for a 1LDK, and 15,000 yen less for a 2LDK. Judging purely by regional transit coverage and base cost, Komagome can appear very attractive on paper (and going two stops north to Nishigahara in Kita Ward brings 1LDK averages down further to 158,000 yen and 2LDKs to 219,000 yen).
Yet many discerning tenants intentionally choose Hon-Komagome because of the distinct neighborhood atmosphere that shifts across the ward boundary. The environs around Komagome Station—particularly the shopping streets near the East and North exits, as well as the commercial areas in the lowland of Nishigahara 1-chome—feature lively merchant strips and casual dining, but also generate substantial foot traffic and bustle typical of a JR loop transfer point. In contrast, Hon-Komagome presents a dignified residential aesthetic where Edo-period temple groves and mid-rise residential architecture blend harmoniously, offering well-lit, peaceful streets when returning late in the evening.
For international families, Bunkyo Ward's public education standards, municipal support structures, and lower overall crime figures are also decisive considerations. If you prefer heading out to major entertainment centers via the Yamanote Line on weekends and eating at casual izakayas near the station, Komagome is an excellent fit. If you value tranquility behind your front door, academic surroundings, and easy walking access to the Toei Mita Line, Hon-Komagome aligns more closely with your expectations.
Hon-Komagome vs. Todaimae and Korakuen: Grocery Footpaths and Budget Boundaries
One station south, Todaimae Station (Bunkyo Ward; averaging 4,500 yen/m²) is also on the Namboku Line, with travel times to central Tokyo differing by merely two minutes. In practical daily routines, however, the area surrounding Todaimae along Hongo-dori is largely occupied by university campus grounds, academic research facilities, and historical estates, offering fewer fresh produce supermarkets on the journey home. Unless you are specifically seeking an address in Nishikata or Mukogaoka within prestigious elementary school catchment zones, Hon-Komagome offers rent savings of about 12,000 yen monthly on a 1LDK and 17,000 yen on a 2LDK, alongside a far richer selection of grocers on the Hakusan side for home cooking.
Traveling two stops south to Korakuen Station (averaging 4,600 yen/m²) or adjacent Kasuga Station (4,800 yen/m²) places extensive commercial complexes like LaQua and four-line subway connectivity at your doorstep. However, average 2LDK rents there climb to between 286,000 and 307,000 yen. By making a deliberate choice—relying on Hon-Komagome for quiet day-to-day living while taking the Namboku Line just two stops (4 minutes) or cycling to Korakuen for specialized shopping on weekends—you can secure more spacious living quarters without stretching your monthly financial plan.
Evaluating the 3 Station Exits: Commuting Paths and Grocery Access
Hon-Komagome Station features a unified layout with a single ticket gate on Basement 1 and platforms situated on Basement 3. Having one central concourse ensures you will never get lost when meeting guests, but exiting to ground level is restricted to only three official access points: Exit 1, Exit 2, and the Dedicated Elevator Entrance. Beyond the walking minutes printed on a floor plan, your choice of exit directly impacts which grocery stores you pass and how many flights of stairs you navigate each day.
| Official Exit | Primary Direction & Street | Vertical Transport | Key Facilities & Neighborhood Landmarks |
|---|---|---|---|
| Exit 1 | Hakusan-dori / Towards Toei Mita Line Hakusan Station | Escalator available (No elevator) |
MyBasket Hon-Komagome Ekimae (1 min walk), Hakusan Station (3–4 mins), Co-op Hakusan (4 mins), Santoku Hakusan (4 mins), Hon-Komagome SO Building |
| Exit 2 | Hongo-dori / Towards Komagome Hospital | Stairs only (No elevator or escalator) |
MyBasket Hon-Komagome 3-chome (3 mins walk), Hon-Komagome Post Office, Kichijoji Temple (4 mins), Tokyo Metropolitan Komagome Hospital (10 mins), Hon-Komagome Building |
| Dedicated Elevator Entrance | Direct street connection (Hon-Komagome Elementary School Intersection) | Elevator equipped (Street to concourse direct) |
Towards Bunkyo Ward Komamoto Elementary School; the only step-free path linking street level, B1 gates, and B3 platforms (via north-end platform elevator) |
Exit 1 (Hakusan-dori Side): The Core Route for Fresh Food and Dual Grocers
For individuals who cook at home and prioritize grocery efficiency, Exit 1 serves as the backbone of daily life. Stepping out onto the street, you will find "MyBasket Hon-Komagome Ekimae" just a 1-minute walk away, making it effortless to pick up milk, bread, or quick pantry staples on late weeknights before heading home.
Even more reassuring is that walking roughly 4 minutes down toward Hakusan Station opens access to two mid-sized supermarkets: "Co-op Hakusan" (near Hakusan Station Exit A3) and "Santoku Hakusan." On weekends when you want to choose fresh seafood, quality cuts of meat, or seasonal produce, or on days when you prefer prepared delicatessen items, Co-op and Santoku provide ample selection, while MyBasket handles quick daily replenishment. Clients who initially worry that Hon-Komagome lacks grocery options find that walking the route from Exit 1 toward Hakusan 5-chome completely resolves their meal-prep concerns.
Exit 2 (Hongo-dori / Dozaka Side): Quiet Living Surrounded by Temple Greenery and Healthcare
Exit 2 leads northeast along Hongo-dori toward Dozaka, revealing a leafy streetscape framed by mature roadside trees, boutique office buildings, and tidy condominium residences. A 3-minute walk brings you to "MyBasket Hon-Komagome 3-chome" and the Hon-Komagome Post Office, while a 4-minute walk leads to the grand wooden gate and expansive verdant grounds of historical Kichijoji Temple (Komagome Kichijoji). Continuing approximately 10 minutes east along Hongo-dori brings you to Tokyo Metropolitan Komagome Hospital, a major regional medical center. This quiet sector is favored by remote workers, academic professionals, and long-term expatriates seeking a peaceful residential rhythm.
The crucial point to note is that Exit 2 features neither an elevator nor an escalator, requiring you to navigate stairs only between the B1 concourse and ground level. While negligible during an unencumbered morning commute, this climb can feel strenuous with heavy grocery bags or when nursing a physical injury. When inspecting apartments in Hon-Komagome 3-chome or near Dozaka, be sure to check the stair count and evaluate the walking distance if you need to detour to the dedicated elevator entrance across the intersection.
Dedicated Elevator Entrance: Essential Step-Free Route for Strollers and Heavy Luggage
For international families using baby strollers or frequent travelers wheeling heavy suitcases, noting the Dedicated Elevator Entrance situated at the Hon-Komagome Elementary School Intersection is imperative. At Hon-Komagome Station, the only fully step-free route from the B3 train platform to the street involves taking the elevator near the Akabane-iwabuchi end of the platform up to the B1 ticket concourse (which features a wheelchair-accessible multi-purpose restroom), passing through the gates, and using this dedicated elevator up to street level.
While Exit 1 includes an upward escalator, it lacks an elevator and cannot accommodate strollers safely. Consequently, even if you rent an apartment located directly behind Exit 1 or Exit 2, navigating with a stroller requires crossing the main thoroughfare at the intersection to access the dedicated elevator. When viewing properties with young children, we strongly advise walking the actual footpath to this specific elevator rather than relying solely on the theoretical station distance noted on promotional flyers.
Hongo Plateau Ground Stability, Slope Dynamics, and Inspection Checklist
Elevated Diluvium Ground at 20–25m and Slopes to Surrounding Lowlands
A primary reason Hon-Komagome 1-chome through 3-chome has maintained high residential desirability across decades is its solid geological foundation. The area rests directly on the spine of the Hongo Plateau—the eastern edge of the expansive Musashino Uplands—at an elevation of approximately 20 to 25 meters above sea level. This neighborhood is built upon dense Kanto Loam (volcanic ash plateau) known for structural firmness. Under the official Bunkyo Ward Flood Hazard Map, the plateau area surrounding the station sits entirely outside designated river flood inundation zones, offering substantial reassurance regarding heavy rainfall and liquefaction risks.
However, being perched atop a plateau ridge naturally means that moving east or west off the plateau involves traversing distinct slopes. Walking north or south along Hongo-dori (toward Komagome or Todaimae) is virtually flat and effortless. Conversely, walking down from Exit 1 toward Hakusan-dori (Hakusan-shita) or descending eastward toward Sendagi (such as down Dango-zaka) entails noticeable downhill gradients—and corresponding uphill climbs on the way home. While a 7- to 8-minute walk may appear minor on mapping apps, ascending these hills during humid summer months or on a single-speed bicycle can be demanding. If you plan to travel broadly across neighboring districts, opting for an electric-assist bicycle and confirming bicycle parking availability at your building is highly recommended.
Commercial Zoning along Boulevards vs. Interior Residential Tranquility
When selecting a home in Hon-Komagome, the living environment differs substantially depending on whether your building faces the primary boulevards or sits just one block back on an interior residential lane. Parcels facing Hongo-dori and Hakusan-dori are designated as Commercial Zones, characterized by reinforced concrete mid-rise condominiums with street-level retail, clinics, or convenience stores. Just one turn inward into Hon-Komagome 3-chome, the urban planning designation transitions to Category I Residential or Category I Mid/High-Rise Residential Zones, strictly prohibiting large entertainment venues and preserving quiet, tree-lined residential pockets.
Interior Residential Enclaves (e.g., Hon-Komagome 3-chome)
- ✓ Dominated by low-rise to mid-rise residences with very light vehicular traffic at night and on weekends
- ✓ Close to temple greenery such as Kichijoji, allowing you to open windows comfortably on quiet mornings
- ✓ Rent levels are often slightly more moderate than main boulevard frontages, balancing floor space with calm
Boulevard Frontages (e.g., Along Hongo-dori / Hakusan-dori)
- ✓ Walking routes from station exits to apartment lobbies follow wide, brightly lit main sidewalks
- ✓ Direct, effortless access to MyBasket and the supermarkets clustered near Hakusan Station
- ✓ Rich inventory of modern apartments equipped with auto-locks, security cameras, and delivery parcel lockers
On-Site Inspection Points: Acoustic Sashes, Foundation Drainage, and Evening Paths
When viewing properties in Hon-Komagome, three subtle structural and environmental elements require careful verification beyond the listing photographs. First, evaluate window glazing and sound-insulation ratings (such as T-rated acoustic frames or secondary double sashes) in units facing Hongo-dori or Hakusan-dori. While bright sidewalks are reassuring at night, main avenues carry steady daytime traffic, and emergency medical vehicles heading to nearby hospitals may pass by. During your viewing, close all windows and ventilation dampers, stand in silence for several minutes, and confirm that ambient sound levels match your comfort threshold.
Second, examine site drainage, retaining walls, and moisture levels in ground-floor units situated along sloping terrain. Although the plateau carries very low regional flood risk, buildings constructed on sloping contours may have ground-floor units where the rear walls sit partially below street grade. Inspect retaining walls and exposed foundations for hairline cracks or damp water marks, and check that exterior drainage channels are clean and free of silt to prevent indoor humidity issues during rainy seasons.
Third, observe street lighting and sidewalk dimensions once you turn off the main roads into residential zones. While interior alleys in Hon-Komagome 3-chome or around historic temples are exceptionally quiet, foot traffic drops noticeably after 9:00 PM. We recommend walking the route between the station exit and your prospective apartment during dusk or late evening to observe street lamp intervals and verify that pedestrian pathways feel well-illuminated and comfortable.
When to Consider Alternative Stations: Clear Selection Criteria
Lifestyle Requirement: One-Stop Station Retail and Abundant Dining Out
Regardless of neighborhood safety and structural ground quality, Hon-Komagome may feel restrictive for certain lifestyle habits. The clearest example is for individuals who prefer stopping at an integrated station shopping mall on their way home—to browse bookstores, clothing boutiques, and upscale department store food halls—or those who eat dinner out nightly at diverse station-front restaurants. Hon-Komagome Station features no large-scale commercial centers; daily shopping relies primarily on two MyBasket locations and the supermarkets near Hakusan Station.
While adequate for home cooking, if you desire vibrant commercial surroundings and extensive evening dining steps from the ticket gates, shifting your search two stops south to Korakuen Station (1K approx. 119,000 yen; 1LDK 200,000 yen) or one stop north to Komagome Station (1K approx. 104,000 yen; 1LDK 173,000 yen) will yield greater day-to-day satisfaction.
Stroller or Wheelchair Use with Routes Disconnected from the Elevator Exit
As detailed above, the step-free route from platform to ground level at Hon-Komagome is confined to the Dedicated Elevator Entrance situated at the Hon-Komagome Elementary School Intersection. Exit 2 has stairs only, and Exit 1 lacks an elevator. If you push a stroller daily and your prospective apartment sits northeast of Exit 2 or downhill along Hakusan-dori, your routine will require detouring across pedestrian crossings to reach this single elevator entrance.
During morning nursery drop-offs and rush hours, this extra walking time can become a recurring inconvenience. If the path from your favored building to this elevator proves cumbersome, comparing options around Korakuen—which offers extensive step-free infrastructure—or alternative stations along the Toei Mita Line will be a practical alternative.
Desire to Eliminate All Daily Slope Climbing from Your Footpaths
Walking exclusively along the crest of the Hongo Plateau (parallel to Hongo-dori) allows you to live on completely level terrain. However, if your daily routine involves descending into the lowlands near Hakusan-dori or traveling eastward toward Sendagi and the historic Yanesen quarter (down Dango-zaka) on foot or with an unassisted bicycle, you will consistently face an uphill return journey. Navigating these inclines in wet weather or carrying small children can prove tiring.
If having entirely flat walking routes between the station, supermarkets, and your front door is your non-negotiable priority, you should either restrict your apartment search strictly to the plateau crest within Hon-Komagome 1-chome through 3-chome, or broaden your search toward areas like Sugamo Station on the Toei Mita Line / JR Yamanote Line (Toshima Ward; 1K approx. 107,000 yen; 1LDK 178,000 yen), where expansive level shopping streets simplify daily movement.
Conclusion: Balancing Residential Peace with Practical Dual-Line Commutes
Hon-Komagome is not a flashy commercial district built to draw crowds. However, for international residents and families who value the academic tranquility of Bunkyo Ward and the structural stability of the Hongo Plateau, while choosing to step back from downtown Minato and Chiyoda price points to enjoy larger living quarters, and who appreciate having Hakusan Station's Toei Mita Line and supermarkets just 3 to 4 minutes away as a seamless extension of their home, Hon-Komagome provides an exceptionally rewarding quality of life.
The true charm of this location lies in naturally weaving together the strengths of Hon-Komagome and Hakusan, with leisurely weekend walks into Komagome or the cultural lanes of Sendagi. You gain both dual-subway connections that bring ease to morning departures and quiet residential streets that let you unwind comfortably at night, all preserved within a sustainable budget.
When searching online portals from overseas or across town, questions naturally arise: "How steep is the actual slope from this listing to Hakusan Station?" "Will street noise on this main avenue disturb home office work?" or "Is this apartment still actively accepting applications?" If you send a listing URL or screenshot to our official LINE account (@soraitokyo), our licensed real estate advisors will verify its live availability through industry-wide clearinghouses (REINS), provide objective second opinions on initial cost quotes, and confirm lease screening requirements. You can also explore our digital tools anytime without requiring a Japanese phone number or facing unsolicited sales calls. Please feel free to reach out at your own pace, and let us assist you in finding a serene, comfortable home in Tokyo.
Frequently Asked Questions: Living & Renting in Hon-Komagome
QHow far is the walk between Hon-Komagome Station and Hakusan Station on the Toei Mita Line?
AThe walk from Exit 1 of Hon-Komagome Station to Hakusan Station on the Toei Mita Line is approximately 3 to 4 minutes. While there is no underground connecting passageway, the stations are separated by only a single street crossing. Many residents seamlessly switch between the Namboku Line (for Nagatacho, Tameike-sanno, and Roppongi-itchome) and the Toei Mita Line (for Otemachi, Hibiya, and Mita). As the path slopes gently downward from Hon-Komagome toward Hakusan (and uphill when returning), we recommend walking the route during your property viewing to experience the gradient firsthand.
QSince there are no large malls at the station, where do residents do everyday grocery shopping?
AWhile there is no large department store or shopping mall, "MyBasket Hon-Komagome Ekimae" is just a 1-minute walk from Exit 1, and "MyBasket Hon-Komagome 3-chome" is a 3-minute walk from Exit 2, making weeknight staple runs very easy. Furthermore, walking roughly 4 minutes from Exit 1 toward Hakusan Station provides access to both "Co-op Hakusan" and "Santoku Hakusan." Combining these stores allows home cooks to purchase fresh produce, fish, and meats without feeling inconvenienced.
QWhat should I keep in mind when using the station with a stroller or heavy luggage?
AThe only step-free route from ground level down to the B1 concourse and B3 platform is the Dedicated Elevator Entrance located at the Hon-Komagome Elementary School Intersection. Exit 1 has an escalator but no elevator, while Exit 2 is equipped with stairs only. The concourse features a multi-purpose barrier-free restroom and the train platforms are protected by full-height screen doors; however, families using strollers regularly should measure their walking distance based specifically on the route to this dedicated elevator entrance.
QWhat are the ground stability, flood risk, and topography characteristics of the Hon-Komagome area?
AThe area around Hon-Komagome 1-chome through 3-chome sits on the Hongo Plateau at an elevation of 20 to 25 meters, composed of stable Diluvium loam soil. Under the Bunkyo Ward Flood Hazard Map, it is situated outside anticipated flood inundation zones. While north-south walking along Hongo-dori is flat and easy, moving east or west toward Hakusan-dori or Sendagi involves noticeable inclines. If you plan to travel widely across the neighborhood by bicycle, choosing an electric-assist model will make your daily routines much more comfortable.

Author: Sorai Tokyo Editorial Team (Supervised by Licensed Real Estate Agents)
A real estate consulting team specializing in assisting foreign nationals find rooms and explaining initial costs in Tokyo. We break down language barriers and differences in customs, offering dedicated support in Japanese, English, and Vietnamese for a safe and secure start to your new life.