
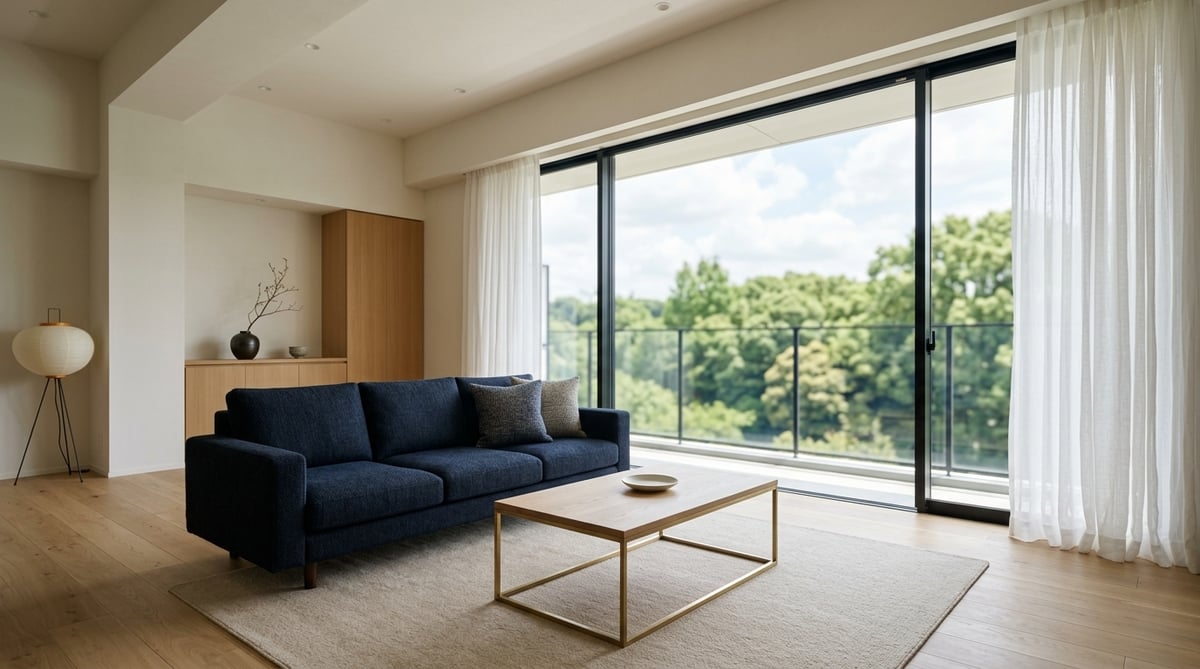
Just past 8:00 AM at Nagatacho Station, as you walk from the Namboku Line platform on the third basement level through the transfer concourse and ride the long escalators down to the Hanzomon Line platform on the sixth basement level—roughly 36 meters underground—you feel a distinct shift in the air and a palpable sense of depth. On a transit map, the Tokyo Metro Namboku Line and Hanzomon Line appear to cross effortlessly at the center of the city. Yet when you actually walk the route as part of a daily commute, you quickly realize there is a three-dimensional distance here that cannot be summed up as simply "one transfer at Nagatacho."
When advising clients on central Tokyo apartment searches, those weighing these two lines almost always pause at two fundamental questions before even looking at rent: "Which business district do I want to reach directly on weekday mornings?" and "What kind of neighborhood atmosphere do I want to come home to on weeknights and weekends?" For example, when searching for a 1LDK for two people in the ¥170,000–¥190,000 per month range, daily life takes on a very different shape depending on whether you choose the calm residential streets of the Hongo Plateau in Komagome on the Namboku Line (median ¥173,000), the station-building shopping convenience of Kinshicho on the Hanzomon Line (¥178,000), or stretch your budget slightly for morning originating-train seating and riverside cafes in Kiyosumi-Shirakawa (¥196,000).
Looking further toward southern central Tokyo—Shirokane-Takanawa (1LDK median ¥263,000) and Azabu-Juban (¥289,000)—or westward to Omotesando (¥284,000), two-year total housing costs diverge by well over a million yen, and the contrast between plateau and lowland terrain becomes unmistakable. Below, we organize the practical criteria—direct office corridors, morning train capacity, and neighborhood character—to help you choose the line and station that fit your daily rhythm.
- Choose the Namboku Line for direct north–south access to Roppongi-itchome, Tameike-sanno, and Iidabashi; choose the Hanzomon Line for direct east–west access to Otemachi, Omotesando, and Shibuya.
- During morning rush hour, the 10-car Hanzomon Line (111% peak congestion, plus originating trains from Kiyosumi-Shirakawa) offers noticeably more breathing room than the 6- to 8-car Namboku Line (156% peak congestion).
- Transferring between the two lines at Nagatacho requires a vertical walk between B3F and B6F taking roughly 4–5 minutes, making it worthwhile to prioritize direct-line commuting.
Choosing Your Line by Direct Business Districts and Morning Rush-Hour Comfort
Both the Namboku Line and the Hanzomon Line cut deep through the inside of the Yamanote Line loop, yet they differ sharply in the business districts they serve and their train capacity. While the Namboku Line stitches together central Tokyo vertically from Roppongi, Akasaka, and Tameike up through Yotsuya and Iidabashi, the Hanzomon Line links the creative and commercial hubs of Shibuya and Omotesando directly with the financial and corporate headquarters of Otemachi and Mitsukoshimae. First, let us compare the core operational data of both lines.
| Comparison Item | Tokyo Metro Namboku Line | Tokyo Metro Hanzomon Line |
|---|---|---|
| Key Direct Office & Hub Stations | Meguro, Shirokane-Takanawa, Azabu-Juban, Roppongi-itchome, Tameike-sanno, Nagatacho, Yotsuya, Ichigaya, Iidabashi, Korakuen, Komagome | Shibuya, Omotesando, Aoyama-itchome, Nagatacho, Kudanshita, Jimbocho, Otemachi, Mitsukoshimae, Suitengumae, Kiyosumi-Shirakawa, Kinshicho, Oshiage |
| Train Length | 6-car & 8-car trains (through-service compatible) | 10-car trains |
| Peak Morning Congestion | 156% (Komagome to Hon-Komagome, 8:00–9:00 AM) | 111% (Shibuya to Omotesando, 8:00–9:00 AM) |
| Through-Service Lines | Tokyu Meguro Line, Sotetsu Line, Saitama Railway Line | Tokyu Den-en-toshi Line, Tobu Skytree Line |
| Platform Screen Doors | Full-height enclosed screen doors | Half-height movable platform gates |
| Morning Seating & Operations | Frequent passenger turnover at Korakuen, Iidabashi, and Tameike-sanno | Morning originating trains from Kiyosumi-Shirakawa make seating toward Otemachi & Shibuya accessible |
North–South Mobility (Roppongi-itchome & Tameike-sanno) vs. East–West Mobility (Otemachi & Shibuya)
For professionals commuting to international firms, tech companies, or media offices concentrated around Roppongi-itchome and Tameike-sanno—or to government ministries, universities, and publishers around Yotsuya, Ichigaya, and Iidabashi—the Namboku Line's north–south corridor offers direct, linear mobility that few other lines can replicate. With the rollout of 8-car trains and through-service onto the Sotetsu Line, it has also become a practical choice for those who travel frequently toward Shin-Yokohama via Meguro. For a station-by-station look at living along this corridor, see our Namboku Line Area Guide.
Conversely, if your workplace is in Marunouchi, Otemachi, Nihonbashi (Mitsukoshimae), Aoyama-itchome, Omotesando, or Shibuya, the Hanzomon Line's direct east–west service translates straight into calmer mornings. Commuting from the Namboku Line to Otemachi or Shibuya requires a transfer at Nagatacho, Tameike-sanno, Yotsuya, or Meguro. Similarly, heading from the Hanzomon Line to Roppongi-itchome or Azabu-Juban requires changing trains at Nagatacho or Aoyama-itchome. Identifying whether your daily destination sits on the vertical or horizontal axis is the clearest starting point. You can also explore individual stations in our Hanzomon Line Area Guide.
The Vertical Transfer at Nagatacho: B3F to B6F in Practice
Many renters assume that because the two lines intersect at Nagatacho, living on either line gives easy access to both. In practice, Nagatacho's station layout is worth understanding beforehand. Unlike cross-platform transfers—such as the Ginza and Hanzomon Lines at Omotesando, or the Namboku and Toei Mita Lines at Shirokane-Takanawa—Nagatacho connects the Namboku Line platform on B3F with the Hanzomon Line platform on B6F (roughly 36 meters below ground) via an indoor transfer passageway.
Although escalators and stairs keep you completely sheltered from rain and street crossings, the platform-to-platform walk takes around 4 to 5 minutes under normal conditions. Factoring in morning escalator queues, building this transfer into a daily commute can feel tiring over time. When you do transfer at Nagatacho, riding near Car 1 (Meguro end) on the Namboku Line or Car 10 (Oshiage end) on the Hanzomon Line places you closest to the connecting escalators.
Train Length, Congestion, and Kiyosumi-Shirakawa Originating Trains
For anyone hoping to minimize morning rush-hour fatigue, train capacity is a major differentiator. The Namboku Line operates a mix of 6-car and 8-car trains, and its busiest inbound stretch from Komagome to Hon-Komagome reaches 156% congestion—crowded enough that shoulders touch and using a smartphone takes effort. In addition, its floor-to-ceiling enclosed platform screen doors enhance safety and climate control, though some commuters find the enclosed platform atmosphere slightly confining.
By contrast, the Hanzomon Line runs exclusively 10-car trains, and its peak section from Shibuya to Omotesando records a relatively mild 111% congestion. Because many passengers disembark at Shibuya, the subway section itself feels noticeably calmer than the connecting Tokyu Den-en-toshi Line. Furthermore, morning originating trains depart directly from Kiyosumi-Shirakawa Station, allowing east-side residents who wait one or two trains to sit comfortably while reading or checking emails all the way to Otemachi, Omotesando, or Shibuya.
Who Fits the Namboku Line
- ✓ Your primary workplace is in Roppongi-itchome, Tameike-sanno, Yotsuya, or Iidabashi
- ✓ You prefer quiet, elevated residential neighborhoods with stable ground, such as Komagome or Shirokane-Takanawa
- ✓ You benefit from through-service to Meguro, Musashi-Kosugi, or Shin-Yokohama
- ✓ You favor academic districts and understated residential streets over large entertainment hubs
Who Fits the Hanzomon Line
- ✓ You commute directly to Otemachi, Mitsukoshimae, Jimbocho, Aoyama-itchome, Omotesando, or Shibuya
- ✓ You value 10-car train capacity and morning originating seats from Kiyosumi-Shirakawa
- ✓ You enjoy flat, walkable neighborhoods with waterfront cafes or large station-front shopping
- ✓ You want easy access to connecting lines like the JR Sobu Rapid Line at Kinshicho or Ginza/Chiyoda Lines at Omotesando
Simply enter the rent and deposit from portal listings to calculate a full, itemized breakdown including brokerage and guarantor fees without hidden add-ons.
Rent Benchmarks & 2-Year Total Housing Costs Across 7 Key Stations
To compare livability concretely, it helps to look at the clear rent gradient between central Tokyo and the northern/eastern wards. The table below summarizes median monthly rents and price per square meter across seven representative stations.
| Station (Ward / Line) | Price / sqm | 1R | 1K | 1DK | 1LDK | 2LDK |
|---|---|---|---|---|---|---|
| Komagome (Toshima / Namboku) | ¥4,100/sqm | ¥77,000 | ¥104,000 | ¥128,000 | ¥173,000 | ¥243,000 |
| Kinshicho (Sumida / Hanzomon) | ¥4,200/sqm | ¥79,000 | ¥107,000 | ¥131,000 | ¥178,000 | ¥254,000 |
| Kiyosumi-Shirakawa (Koto / Hanzomon) | ¥4,500/sqm | ¥86,000 | ¥117,000 | ¥143,000 | ¥196,000 | ¥280,000 |
| Shirokane-Takanawa (Minato / Namboku) | ¥5,500/sqm | ¥112,000 | ¥151,000 | ¥186,000 | ¥263,000 | ¥387,000 |
| Nagatacho (Chiyoda / Both) | ¥5,800/sqm | ¥120,000 | ¥162,000 | ¥200,000 | ¥284,000 | ¥418,000 |
| Omotesando (Minato / Hanzomon) | ¥5,800/sqm | ¥120,000 | ¥162,000 | ¥200,000 | ¥284,000 | ¥418,000 |
| Azabu-Juban (Minato / Namboku) | ¥5,900/sqm | ¥122,000 | ¥165,000 | ¥203,000 | ¥289,000 | ¥425,000 |
In Japanese rental contracts, upfront and renewal costs—such as security deposit, key money, agency fees, and the two-year renewal fee—typically add up to roughly four months of rent. Comparing 28-month total housing costs (24 months of rent + 4 months of rent-linked fees) reveals how small monthly differences translate into meaningful budget trade-offs over a standard two-year lease.
Singles (1R & 1K): Komagome's Plateau Calm vs. Kinshicho's Convenience vs. Kiyosumi's Cafes
For solo renters shopping for a 1K in the ¥100,000–¥120,000 range, Komagome on the Namboku Line and Kinshicho on the Hanzomon Line offer a striking contrast. Their two-year total cost differs by only about ¥84,000, meaning finances rarely dictate the choice. Yet stepping out of the station reveals two completely different worlds: Komagome offers quiet, well-lit residential streets atop a stable plateau for peaceful late-night walks home, whereas Kinshicho delivers immediate access to large station malls, cinemas, and JR Sobu Rapid Line connections to Tokyo Station and Shinagawa.
Raising your budget by ¥13,000 per month (roughly ¥364,000 over two years compared to Komagome) brings Kiyosumi-Shirakawa into reach. Whether that premium feels worthwhile depends on how much you value sitting down on an originating morning train to Otemachi and spending weekend mornings strolling through roasteries, Kiba Park, and Kiyosumi Gardens. Meanwhile, among central-core solo renters, the two-year gap between Shirokane-Takanawa and Omotesando is a modest ¥308,000 (¥11,000/month), allowing you to choose naturally between the Roppongi/Mita corridor and the Aoyama/Shibuya corridor.
Couples & Dual-Income Households (1LDK): Weighing the ¥1.87M Two-Year Gap
When couples search for a 1LDK, the seven stations split cleanly into two tiers: the ¥170,000–¥190,000 northern/eastern tier (Komagome, Kinshicho, Kiyosumi-Shirakawa) and the ¥260,000–¥280,000 central tier (Shirokane-Takanawa, Nagatacho, Omotesando, Azabu-Juban). Between Komagome and Kinshicho, the two-year gap is only about ¥140,000 (¥5,000/month). Moving from Kiyosumi-Shirakawa to Shirokane-Takanawa, however, adds ¥67,000 per month—or roughly ¥1,876,000 over two years.
That ¥1.87 million difference represents a clear lifestyle trade-off: paying for ultra-short commutes and quick late-night taxi or walking access in Minato Ward, versus choosing the northern or eastern wards to afford newer buildings, 45+ sqm layouts, or extra savings for travel and investments. Even if a couple's workplaces sit on different lines, overlapping transit options—such as the JR Yamanote Line at Komagome, Toei Oedo Line at Kiyosumi-Shirakawa, JR Sobu Rapid Line at Kinshicho, and Toei Mita Line at Shirokane-Takanawa—make it easy to find a fair midpoint.
Families (2LDK): Finding Realistic Space and Environment
Expanding to a 2LDK for children or dedicated home-office space widens the gap further. Between Kiyosumi-Shirakawa (¥280,000) and Shirokane-Takanawa (¥387,000), the two-year difference reaches roughly ¥2,996,000, and between Komagome (¥243,000) and Shirokane-Takanawa it exceeds ¥4,032,000.
Families targeting the low-to-mid ¥200,000s can look one or two stops further out: Hon-Komagome (¥258,000) or Oji (¥229,000) on the Namboku Line, or Sumiyoshi (¥235,000) next to Sarue Onshi Park and Oshiage (¥246,000) on the Hanzomon Line. Conversely, families with budgets in the high ¥300,000s to ¥400,000s gain quiet, established residential pockets on the Takanawa plateau or in Minami-Aoyama.
On-the-Ground Feel Along the Namboku Line
Walking around Namboku Line stations reveals how dramatically the atmosphere and terrain can shift depending on which exit you take and whether you walk uphill or downhill.
Komagome: Hongo Plateau Calm vs. Valley Shopping Streets
Located where Toshima, Bunkyo, and Kita Wards meet, Komagome changes character across Hongo-dori. Exiting from Exits 1 and 2 on the south side brings you immediately to the greenery of Rikugien Gardens and onto the stable loam plateau of Hon-Komagome and Komagome 1-chome, dominated by mid-rise condominiums and quiet residential streets.
Heading north from Exits 4 and 5 or the JR East Exit slopes gently down into the valley toward Nishigahara, where the Shimofuri Ginza and Azalea-dori shopping streets bustle with greengrocers, delis, and neighborhood eateries. While convenient for quick weeknight errands, properties along main roads or in commercial zones warrant checking window soundproofing and local drainage.
West and southwest of Komagome, a 10- to 12-minute walk overlaps with Sugamo (JR Yamanote & Toei Mita Lines) and Sengoku (Toei Mita Line). If you commute to Otemachi or Hibiya, living closer to Sugamo or Sengoku gives direct Mita Line access; if you commute to Roppongi-itchome, Tameike-sanno, or Iidabashi, staying near Komagome keeps your Namboku Line commute direct. Neighboring Hon-Komagome (1K ¥109,000 / 1LDK ¥182,000) is also worth walking if you want pure Bunkyo Ward quietness.
Shirokane-Takanawa & Azabu-Juban: Hillside Residences and Furukawa River Flats
Though adjacent in Minato Ward, Shirokane-Takanawa and Azabu-Juban serve very different daily rhythms. Shirokane-Takanawa's Exit 4 connects directly underground to the Shirokane Aer City complex, offering rain-free access to Queen's Isetan supermarket, cafes, and clinics. Crucially, Shirokane-Takanawa is a shared station with the Toei Mita Line, offering cross-platform transfers (and shared tracks toward Meguro), so one partner can commute to Tameike-sanno while the other rides directly to Hibiya or Otemachi.
Topographically, climbing Gyoranzaka or Isaragozaka east of Sakurada-dori into Takanawa 1-chome puts you on a quiet loam-plateau residential zone. By contrast, Mita 5-chome and the Furukawa River flats (Shirokane 1-chome and 3-chome) are flat and easy for cycling or strollers, though properties near arterial roads require checking double-glazed windows and local inland flood maps.
Azabu-Juban functions like an open neighborhood dining room. Stepping out of Exit 4 places you on the cobblestone Azabu-Juban shopping street, with Daiei, Seijo Ishii, and Bio c' Bon all within a few minutes' walk, plus Toei Oedo Line access toward Shinjuku and Shiodome. Because the main shopping district sits on flat commercial ground along the Furukawa River, those seeking quieter evenings often choose the elevated slopes of Roppongi 5-chome or Moto-Azabu—or compare with Meguro (1LDK ¥228,000) for JR Yamanote and Tokyu Meguro Line originating-train convenience.
On-the-Ground Feel Along the Hanzomon Line
Crossing the Sumida River and the Imperial Palace, the Hanzomon Line bridges two distinct worlds: flat, open-sky east Tokyo (Koto and Sumida Wards) and mature, plateau-set west-central Tokyo (Chiyoda, Minato, and Shibuya Wards).
Kiyosumi-Shirakawa & Kinshicho: Waterfront Cafes and Major Terminal Convenience
Just three stops east of Otemachi, Kiyosumi-Shirakawa blends Edo-era Fukagawa heritage with independent roasteries, galleries, Kiyosumi Gardens, and Kiba Park. Everyday groceries are well covered by Akafudado right outside Exits A2 and B1 and Maruetsu along Kiyosubashi-dori. One key zoning detail: much of Kiyosumi 2–3-chome and Shirakawa/Miyoshi is zoned quasi-industrial or commercial, meaning low-rise buildings or parking lots next door could eventually be redeveloped—so check adjacent lots during viewings. While Monzen-Nakacho (Tozai Line) is a 12- to 15-minute walk south, Kiyosumi-Shirakawa's originating Hanzomon Line trains remain its decisive commuting advantage. Budget-conscious renters can also look one stop east to Sumiyoshi (1K ¥99,000 / 1LDK ¥166,000).
One stop further, Kinshicho is east Tokyo's premier commercial terminal, defined by a clear north–south split across the JR tracks. The South Exit (Exits 1–2, Kotobashi) is lively and commercial, anchored by Termina and Parco. Residents seeking calmer streets generally favor the North Exit (Exits 3–5, Kinshi and Kamezawa), where Arcakit Kinshicho, Kinshi Park, and Olinas cover daily errands on flat, grid-laid streets. With the JR Sobu Rapid Line also running directly to Tokyo, Shimbashi, and Shinagawa, Kinshicho is highly practical for dual-commute households.
Omotesando & Nagatacho: Quiet Side Streets Behind Aoyama-dori
Though famous for zelkova-lined avenues and flagship boutiques, Omotesando transforms completely just one block off Aoyama-dori. After picking up groceries at Kinokuniya International near Exit B2, stepping into Minami-Aoyama 3–4-chome or Jingumae 3–4-chome reveals low- and mid-rise apartments tucked along quiet plateau lanes with minimal through-traffic. Cross-platform transfers between the Hanzomon and Ginza Lines—plus the Chiyoda Line—connect Otemachi, Ginza, Akasaka, and Shibuya in minutes, offering more residential depth than neighboring Aoyama-itchome (1LDK ¥270,000) or Shibuya (¥274,000).
Around Nagatacho (Nagatacho, Hirakawacho, Kioicho), access to the Namboku, Hanzomon, and Yurakucho Lines—plus indoor walkways to Akasaka-mitsuke's Ginza and Marunouchi Lines—provides unmatched central reach. While traditional shopping streets are scarce, Tokyo Garden Terrace Kioicho (with Seijo Ishii) and nearby Kojimachi cover daily needs in a notably quiet, high-security setting. For more everyday eateries and supermarkets, one stop west to Hanzomon Station (Ichibancho/Kojimachi, 1LDK ¥267,000) is a comfortable alternative.
Plateau vs. Lowland Hazard Profiles: When to Pass on a Line & How to Inspect
Understanding Tokyo's terrain helps clarify when it is smarter to pass on a particular line or neighborhood.
Musashino Plateau vs. Arakawa & Furukawa Lowlands
Roughly west of the Imperial Palace and the Ueno–Akabane line sits the stable Musashino (loam) plateau at 20–30 meters elevation—covering Komagome, Hon-Komagome, Yotsuya, Ichigaya, Omotesando, Aoyama-itchome, and Nagatacho, most of which lie outside municipal flood-hazard zones. However, even in Minato Ward, valley pockets like Mita-side Shirokane-Takanawa and Azabu-Juban 2-chome sit along the ancient Furukawa River basin and can face localized inland flooding during intense downpours.
East of the Sumida River, Kiyosumi-Shirakawa, Kinshicho, and Oshiage sit on flat alluvial lowlands. While wonderfully easy to walk and cycle, official Arakawa River maximum-rainfall hazard maps project 3 to 5 meters of potential inundation (roughly second-floor eaves height) in parts of this area. If minimizing flood exposure at the neighborhood level is a non-negotiable priority, elevated Namboku Line areas like Komagome or Hon-Komagome are the safer fit. If you choose Kiyosumi-Shirakawa or Kinshicho for their lifestyle and commute, make reinforced concrete (RC) buildings on the 2nd floor or higher (ideally 3rd floor+) your baseline and verify building flood-protection measures.
When to Pass on Each Line
Consider passing on the Namboku Line if you commute daily to Otemachi or Shibuya and want to avoid the 4- to 5-minute B3F–B6F transfer at Nagatacho (the exception being Shirokane-Takanawa or Meguro, where shared Toei Mita Line trains reach Otemachi directly), or if you dislike enclosed platform screen doors and 6- to 8-car rush-hour crowding.
Consider passing on the Hanzomon Line if you need a ¥100,000–¥110,000 1K or ¥170,000–¥190,000 1LDK on flood-free plateau ground—where Komagome, Hon-Komagome, or Oji offer far more inventory—or if your daily workplace is Roppongi-itchome, Tameike-sanno, or Azabu-Juban.
Once you narrow down your shortlist, verify these three details in person before applying:
Conclusion: Choosing the Line and Neighborhood That Fit Your Daily Rhythm
Intersecting at Nagatacho, the Namboku Line and Hanzomon Line are not competing options where one is simply better—they are two distinct corridors built for different Tokyo lifestyles. Whether you prioritize direct north–south access to Roppongi-itchome and Iidabashi with Komagome's plateau calm, Shirokane-Takanawa's dual Mita Line convenience, or Azabu-Juban's lively streets—or prefer the Hanzomon Line's 10-car east–west reach to Otemachi and Shibuya from Kiyosumi-Shirakawa, Kinshicho, or Omotesando—weighing two-year total housing costs alongside your daily commute and weekend walks will point you to the right fit.
If you are weighing multiple stations or want a second opinion on a listing's terms, feel free to reach out to Sorai Tokyo anytime. Simply send any property URL to our 24/7 AI concierge on LINE (@soraitokyo)—no phone number, store visits, or pushy sales calls required. Our licensed specialists will check live availability in the inter-agency database, provide a free transparent quote second opinion, and support you smoothly with no-guarantor options and visa-friendly rental screening.
Frequently Asked Questions (FAQ)
QHow long does transferring between the Namboku and Hanzomon Lines at Nagatacho actually take?
AAt Nagatacho, the Namboku Line is on B3F and the Hanzomon Line is on B6F (about 36 meters underground), connected by an indoor passageway with escalators and stairs rather than a cross-platform transfer. Expect about 4 to 5 minutes platform-to-platform. Riding near Car 1 (Meguro end) on the Namboku Line or Car 10 (Oshiage end) on the Hanzomon Line puts you closest to the transfer escalators.
QWhich stations offer the strongest value for singles (1K) or couples (1LDK) commuting to central Tokyo?
AFor mid-¥100,000s 1Ks or ¥170,000s 1LDKs, Komagome on the Namboku Line (1K ¥104,000 / 1LDK ¥173,000) offers plateau calm and shopping streets, while Kinshicho on the Hanzomon Line (1K ¥107,000 / 1LDK ¥178,000) offers major retail and JR Sobu Rapid Line access. If you value seated morning commutes and cafe culture, Kiyosumi-Shirakawa (1K ¥117,000 / 1LDK ¥196,000) is a natural step up, while Sumiyoshi (1LDK ¥166,000) and Oji (1LDK ¥162,000) lower costs further.
QWhat should I check regarding flood risk when renting in Kiyosumi-Shirakawa or Kinshicho?
AFlat areas in Koto and Sumida Wards sit on the Arakawa–Nakagawa lowland, where maximum-rainfall hazard maps project 3 to 5 meters of potential inundation in some blocks. Prioritize reinforced concrete (RC) apartments on the 2nd floor or above (ideally 3rd floor+), and check during viewings for entrance flood barriers and elevated electrical rooms to prevent power outages.
QWhich line is more convenient if I commute to Otemachi?
AThe Hanzomon Line serves Otemachi directly, making stations like Kiyosumi-Shirakawa, Kinshicho, and Omotesando effortless one-seat commutes. However, Shirokane-Takanawa and Meguro on the Namboku Line share tracks and platforms with the Toei Mita Line, which also runs directly to Hibiya and Otemachi—making Shirokane-Takanawa a notable exception if you prefer Minato Ward living.

Sorai Tokyo Co., Ltd. Editorial (Licensed Real Estate Agency #113297)
Licensed online real estate agency handling residential leasing across 15 major Tokyo lines (Member of All Japan Real Estate Association). Powered by our proprietary 24/7 AI "SorAi" on iOS/LINE and dedicated licensed realtors, we support renters end-to-end from vacancy checks on major portals to viewings and digital contracts.